

 Written by
 Model Trains for Beginners: First Layout Guide and Design Ideas
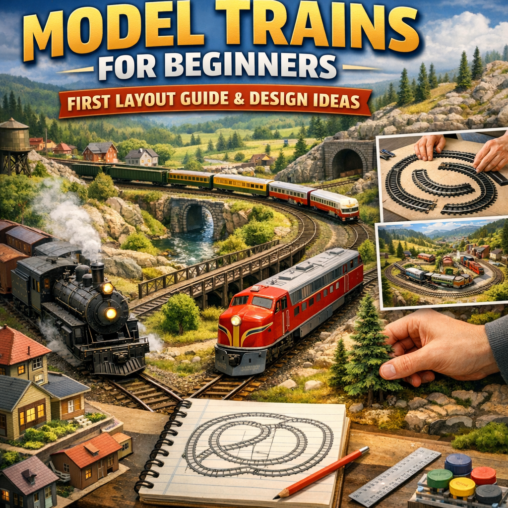
If you’re reading this, you’re likely ready to join the rewarding hobby of model railroading. This model railroad beginner guide is designed to walk you through how to start model trains, from choosing a scale to planning your first layout and building scenery. Whether you want a compact starter layout on a shelf or a sprawling multi-level empire, this article will give you the foundational knowledge, practical examples, and layout ideas to start with confidence.
Why Start Model Trains?


Model trains combine engineering, artistry, and storytelling. Many beginners enjoy:
– Building something tangible from scratch.
– Learning electronics and carpentry in small, satisfying projects.
– Creating miniature worlds that run on schedules and tell stories.
– Socializing with clubs, shows, and online communities.
This guide focuses on being a practical model railroad beginner guide with clear steps and design ideas to help you get moving.
Step 1 — Define Your Goals and Constraints

Before buying anything, define what you want and what limits you have. Ask yourself:
– Purpose: Do you want operating sessions, scenery/building-focused modeling, or simply a train-running display?
– Space: How much room do you have? A spare room, basement, or a single shelf?
– Time: Are you looking for quick gratification or a long-term project?
– Budget: What’s your realistic budget for the first year?
– Scale: Do you prefer high detail or small-footprint layouts?
Answering these will shape choices about scale, layout type, control system, and how complex your track plan should be.
Step 2 — Choose a Scale
Scale affects size, cost, and space needs. Common beginner-friendly scales:
– HO (1:87)
– Most popular scale; best balance of detail and size.
– Wide variety of readily available rolling stock, track, structures, and accessories.
– N (1:160)
– Smaller; fits more layout in less space.
– Slightly harder to work on due to smaller parts.
– O (1:48) and G (garden, various)
– Larger and more dramatic but require more space and budget.
– Z (1:220)
– Very small; niche market.
For most beginners, HO and N are excellent starting points. Use the keyword: model trains for beginners — it’s common to start with HO or N when learning how to start model trains.
Step 3 — Select Track, Control, and Power
Track and control determine how your trains run. Choices include:
– Track types:
– Sectional track: pre-cut pieces that snap together (good for beginner layouts).
– Flex track: bendable track for custom curves and more prototypical geometry.
– Turnouts (switches):
– Manual vs. powered (solenoid or stall motor).
– Vary radius and frog type depending on scale and prototype.
– Control systems:
– DC (Analog): Simple, controllers provide variable voltage; multiple trains on same track require block wiring.
– DCC (Digital Command Control): Each locomotive has a decoder; multiple trains independently controlled on the same track.
– DCC is increasingly recommended for newcomers who want to run multiple trains with independent control.
Wiring basics:
– Use a bus wire (two heavy gauge wires) running under the layout with feeder wires every 1–3 feet to the track.
– Solder feeders to rails or use clean, reliable clip connections.
– For DCC, make sure your power bus and boosters can handle the maximum current draw.
Step 4 — Benchwork and Base Construction
Start with a sturdy platform. Common beginner options:
– 4×8 sheet of 3/4″ plywood on 2×4 or equivalent frame (classic and versatile).
– Folding layout or portable table for limited space.
– Shelf units (narrow depth 12–24″) for continuous runs along a wall.
– Modular standards (e.g., Free-mo) if you plan to join other layouts.
Tips:
– Keep the benchwork level and accessible from all sides. Consider a “walk-around” layout if space permits.
– Decide your track height (comfortable working/operating height is ~42–48 inches).
– Add access hatches or removable fascia for electronics.
Step 5 — Simple First Track Plans
A first layout should be manageable and fun to operate. Here are beginner-friendly model railroad layout ideas:
1. Classic Oval with Yard (4×8 HO example)
– Main loop for continuous running.
– Siding yard with 3–4 tracks for storing trains.
– Industry spur for switching.
– Good for learning wiring, uncoupling, and basic scenery.
2. Point-to-Point Branch Line (Shelf layout)
– Two end stations with a single run between them.
– Passing siding in the middle for meets.
– Ideal for passenger operations or prototypical branchline freights.
3. Inglenook Sidings (Switching Puzzle)
– Small switching layout based on the Inglenook shunting puzzle.
– 5 sidings and one lead; challenges involve assembling specific consists.
– Great for solo “operations” without requiring large space.
4. Continuous Switching Loop / Around-the-walls Layout
– Combines continuous run with multiple spurs for switching.
– Fits well in basements or long rooms.
5. Portable Folding Layout
– Two-leaf design that folds for storage.
– Usually includes a scenic center and simple reversing loops.
Examples of dimensions:
– HO 4×8: main loop radius 18″ inside, 22″ outside; yard with three 24″ tracks.
– N 3×8 shelf: mainline along shelf, passing siding, 2 industries; trains are short (4–6 cars).
Step 6 — Track Planning Principles
Follow basic track design rules to ensure reliable operation:
– Use gradual curves: larger radii for mainlines improve appearance and reduce derailments.
– Avoid S-curves through turnouts; create a straight pocket through a switch.
– Grade limits: keep grades under 2–3% for most rolling stock.
– Provide runaround tracks and passing sidings for operational interest.
– Make turnouts accessible for maintenance; leave room for tools.
Free software: AnyRail, SCARM, XTrackCAD can help you draft plans and calculate rail lengths.
Step 7 — Scenery and Structures
Scenery is where creativity shines. Basic process:
1. Subroadbed: Plywood or foam sheets. Lay down track on cork roadbed for realistic elevation and sound deadening.
2. Contouring: Use extruded foam (XPS) to form hills and benchwork; carve and glue layers.
3. Ground cover: Apply a base coat of paint or textured plaster; then add ground foam, static grass, and ballast.
4. Ballasting track: Use fine ballast glued with diluted white glue (50/50 water and glue with a drop of dish soap).
5. Trees and foliage: Start with ready-made trees or make your own with armatures.
6. Structures: Kits or 3D-printed buildings. Weathering paints help realism.
7. Details: People, vehicles, signage, and small clutter bring scenes alive.
Begin with a small scenic area and expand. Remember the three-dimensional rule: foreground detail, midground transition, background backdrop painting for depth.
Step 8 — Rolling Stock and Locomotives
Start with a basic good runner locomotive and a small set of freight or passenger cars:
– For model trains for beginners, starter sets often include a locomotive, a controller, and a few cars—good for initial learning.
– Upgrade to a locomotive with metal wheels and a good motor for reliable operation.
– Clean wheels and track regularly to avoid poor electrical pickup.
– Consider buying used equipment from hobby shops, swap meets, or online marketplaces to save money.
Examples:
– A good starter HO freight consists of a GP or SD series locomotive with 6–8 cars for yard switching and short freight runs.
– For N scale, choose short consists (4–6 cars) and tighter radii.
Step 9 — Wiring and Electronics
Basic wiring checklist:
– Bus wires: 14–16 AWG for main DCC bus, 18–20 AWG for DC bus. Feeder wires 22–24 AWG to track.
– Connect power to the main controller and test continuity.
– For DC: Divide layout into power districts to control multiple trains. Use reversing sections or reversing loops with insulated gaps and DPDT switch to prevent short circuits.
– For DCC: Install boosters if layout draws more current than a single command station can provide. Keep feeders frequent to reduce voltage drop.
Add accessories:
– Turnout motors with switch machines, either controlled by toggles or via DCC accessory decoders.
– Signals, lighting, and animated accessories can be added later.
Safety: Fuse each power district to protect wiring and equipment.
Step 10 — Operations and Running Sessions
Operations give purpose to your layout:
– Timetable and train orders: Schedule trains and have them perform tasks at specific locations.
– Car cards and waybills: Track individual freight cars and their destinations to simulate real freight movements.
– Switching puzzles: Assign switching jobs like servicing industries, making up trains, or assembling consists.
– Passenger timetables: Run scheduled passenger trains with station stops.
For beginners, simple operations like running a local freight making pickups and setouts is highly satisfying.
Design Ideas to Spark Creativity
Here are themed layout ideas for various interests and sizes:
– Small Town Branchline
– HO or N scale
– 4×8 or shelf layout
– Focus on a small depot, feed mill, and coal yard.
– Operations: mixed train with local pickups.
– Industrial Switching (Terminal)
– Compact layout (2–3’ x 6’)
– Multiple spurs and industries; use the Inglenook or timesaver yard design.
– Great for solo operation and practicing prototypical switching.
– Mountain Logging Railroad
– Narrow gauge feel, steep grades, trestles.
– Use shorter cars and smaller locomotives.
– Scenic focus: rock molds, dense forest, logging camps.
– Urban Freight Terminal
– Focus on dense city scenery, warehouses, and multimodal interchange.
– Add street-level operations with trucks and cranes.
– Commuter Passenger Layout
– Two-track main with a subway or elevated section.
– Emphasize station detail, platforms, and high-frequency runs.
– Garden Railway (G Scale)
– Outdoors, large scale, robust equipment.
– Build landscapes using real plants and water features.
Tools, Supplies, and Budget Tips
Essential tools:
– Hobby knife, cutting mat, small saw, needle files.
– Wire strippers, soldering iron, multimeter.
– Rail cutters and track pliers.
– Paint brushes, static grass applicator (optional).
Starter supplies:
– Flex track and turnouts, roadbed, cork sheet, ballast.
– Foam or plywood subroadbed, glue (white glue and styrofoam-safe adhesives).
– Paints, scenic materials, trees, and figures.
Budget tips:
– Begin with a starter set to learn basics; upgrade components over time.
– Buy used locomotives and rolling stock—many hobbyists sell lightly used gear.
– Build structures from kits or 3D print them instead of full scratch-building initially.
– Join a local club for access to tools, advice, and sometimes layouts to run on.
Maintenance: Keeping Trains Running Smoothly
Regular maintenance will keep operations reliable:
– Clean rails frequently with isopropyl alcohol and track cleaning tools.
– Keep wheelsets clean; use a wheel cleaner or cleaning pads.
– Lubricate locomotive gears sparingly with plastic-safe oil.
– Inspect turnouts for debris and ensure switch points are tight.
Record problems and address them promptly—small fixes prevent bigger issues.
Resources: Where to Learn More
– Local model railroad clubs: hands-on mentoring and group layouts.
– Hobby shops: advice, demonstrations, and parts.
– Books: “The Model Railroader’s Guide to…” books and layout planning volumes.
– Online: Forums (Model Railroader, RMweb), YouTube channels, and blogs.
– Software: AnyRail, SCARM, XTrackCAD for layout planning.
Search for model railroad beginner guide videos and articles when you need step-by-step tutorials.
Example First Layout Build: A Simple HO 4×8 Plan
Plan summary:
– Benchwork: 4×8 plywood on 2×4 frame, 42″ height.
– Mainline: Single-loop continuous with 18″ radius (inside) to 22″ radius (outside).
– Yard: 3-track yard (each ~24″ long) for two train consists and one work track.
– Industry Spur: One spur with a small warehouse and a team track.
– Control: DCC with one command station and a 5-amp booster.
– Scenery: One small town scene occupying a 2’x4′ section with backdrop.
Build steps:
1. Cut plywood to 4×8, assemble frame, and attach legs.
2. Layout track plan, mark ballast contours, and pin down cork roadbed.
3. Install flex track and turnouts, solder feeders to bus wires every 18″.
4. Test wiring thoroughly with a multimeter and run a locomotive slowly.
5. Ballast the track, install a backdrop, and add scenery in incremental stages.
6. Paint and weather buildings; place figures and final detailing.
This project gives you a full range of skills—benchwork, track laying, wiring, and scenery—in an achievable package.
Common Beginner Mistakes and How to Avoid Them
– Buying too much too soon: Start small and expand.
– Choosing too-small radii: Larger radii improve reliability and looks.
– Inadequate wiring: Use a proper bus and frequent feeders; minimize voltage drop.
– Overcomplicating the first layout: Keep the first plan simple and operational.
– Skipping testing: Test track sections and wiring incrementally.
Final Thoughts
Model railroading rewards patience and incremental progress. For model trains for beginners, the key is to start with a clear plan: choose a scale, determine space and budget, pick a simple track plan, and learn wiring basics. Use this model railroad beginner guide as a roadmap—build a small, reliable layout first, learn the systems, then expand with confidence. The hobby offers endless avenues for creativity—your first layout can be both a learning platform and a miniature world you’ll enjoy for years.
Conclusion
Starting model trains is approachable and deeply satisfying. Follow this model railroad beginner guide to define goals, choose a scale, plan a manageable first layout, learn basic wiring and scenery techniques, and enjoy operations. Begin small, learn steadily, and let your layout grow with your skills and imagination. Happy modeling!

