


Model Train Setup Step-by-Step: Custom Model Trains & Railroad Modding
Building a model railroad is part engineering, part craft, and entirely personal. Whether you’re starting a small shelf layout or planning a sprawling shelf-to-wall empire, this guide walks you through a complete, step-by-step setup focused on custom model trains, model train customization, and model railroad modding. Expect practical tips, examples, and decisions you’ll want to make at each stage—from planning to wiring, rolling stock upgrades, scenery, and routine troubleshooting.
Why Customize and Mod Your Model Railroad?

Custom model trains and model railroad modding let you make a layout unique, improve reliability, and recreate specific prototypes or fictional settings. Modding can be as simple as swapping couplers and adding weights, or as complex as installing DCC sound decoders, scratchbuilding structures, or rewiring a reversing loop for long, lighted trains.
Benefits:
– Better running performance and fewer derailments
– More realistic locomotives and rolling stock (lighting, sound, weathering)
– Personal expression—your railroad tells your story
– Learnable skills that open new project possibilities
Step 1 — Plan Before You Build
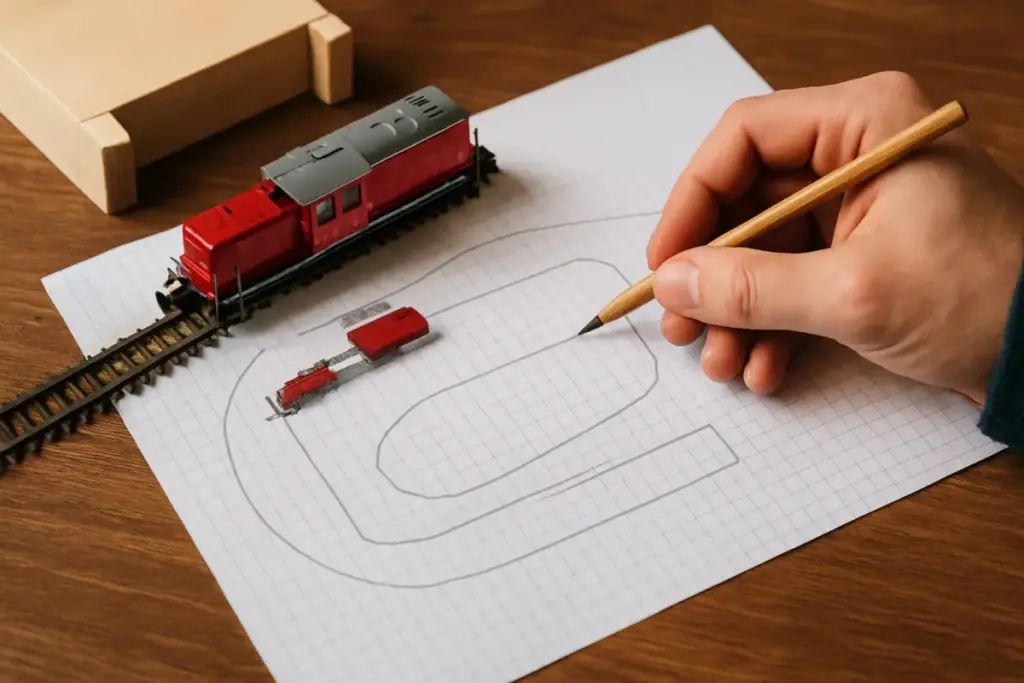
Good planning prevents wasted time and expense. Start small on paper (or digital planning software) and scale your ambition to your space, budget, and patience.
Key planning items:
– Space and benchwork shape (L, U, loop, shelves, peninsula)
– Scale (N, HO, O, etc.) and track radius expectations
– Operational goals: continuous loop, point-to-point, switching layout, or operations-focused with staging yards
– Power and control: DC vs DCC (consider future-proofing with DCC)
– Scenery theme and era (steam era, modern diesel, fantasy)
Example plan: An HO shelf layout 8’ x 2’ with a single mainline loop, one passing siding, and a small industrial switching spur—designed to be DCC-ready and featuring a single scenic hill with a river crossing.
Planning tips:
– Keep minimum aisle widths comfortable for access.
– Use modular planning: divide the layout into easily removable sections (4’x4’ or 2’x4’ sheets) for transport/maintenance.
– Draw track plan and electrical blocks before cutting plywood.
Step 2 — Benchwork and Roadbed
Benchwork supports everything. Choose a method (open grid, L-girder, or modular legs) that suits your skills and layout size.
Materials and approaches:
– Plywood (3/4″) over framework is classic; use multiple smaller sheets (4’x4′ or 4’x2′) if transportation is a concern.
– Foam pad (extruded polystyrene) over plywood makes scenery shaping, wiring, and quiet running easier. Foam simplifies carving creeks, riverbeds, and terrain.
– Cork or commercial roadbed for track (helps with noise and gives realistic profile).
Example: Use a 3/4″ plywood top with 2″ foam glued to it (foam pads) and a cork underlay for mainline track. This provides a quiet surface and makes it easy to plant trees and sink structures slightly into the terrain.
Benchwork tips:
– Make the top height comfortable (typically 40–46 inches). Account for stools if you prefer to sit.
– Ensure a rigid, level surface. Avoid sagging or flex that can shift track geometry.
– Use long screws and gussets to join plywood sections flush where possible. When pieces meet, reinforce with backing strips to prevent separation.
Step 3 — Trackwork: Layout and Laying Track
Track choice and careful laying are critical to reliable operation.
Track choices:
– Flex track for long runs: fewer joints and easier to follow radii
– Sectional track for defined, repeatable curves and turnouts
– Turnouts: use consistent brand/style for appearance and geometry. Peco offers good curved turnout options; Atlas and Kato are widely used for reliable turnouts in HO/N.
– Rail code: use the same code on the mainline for visual and operational consistency; smaller code for branch lines is acceptable.
Step-by-step track laying:
1. Dry-fit track sections to confirm fit and curvature.
2. Mark track centerlines on the foam or plywood.
3. Lay cork roadbed and fasten it with adhesive.
4. Pin or glue track to the roadbed. Leave rail joiners loose until alignment is perfect to avoid binding.
5. Use a track gauge and alignment tools to maintain consistent spacing and gauge.
6. Solder feeder wires to rails at regular intervals (every 3–6 feet on DC; similar on DCC) to ensure good conductivity.
7. Ballast after testing for smooth running.
Examples:
– Use atlas flex track on mainline curves, transitioning to Peco #6 (or #8 for larger radius) turnouts in yards for better appearance and smoother routing.
– On foam, you can bury switch machines or use under-table machines if you plan to use a foam pad—just allow space for rods or embed the mechanism within the foam.
Track tips:
– Clean tracks thoroughly before running trains; nickel-silver track resists tarnish better than brass.
– Avoid S-curves without a straight between them—leave at least one car length of straight between reverse curves.
– Use an NMRA gauge for turnouts and coupler alignment checks.
Step 4 — Wiring and Power Systems
Decide DC or DCC. DCC is the modern standard for ease of multiple trains and decoder-based sound, but DC still works for simple operations.
Wiring basics:
– Use a bus and feeder system: heavier-gauge bus wire (14–16 AWG) under the layout and thinner feeders (22–24 AWG) soldered to rails.
– Feeders every 3–6 feet prevents voltage drop.
– Color-code wiring and document all feeders, blocks, and turnout feeds.
DC considerations:
– Use power districts if your layout is large; blocks controlled by separate controllers.
– Ensure consistent polarity and use insulated joiners where necessary.
DCC considerations:
– DCC keeps track power constant; decoders control locos. Use 14–16 AWG feeder bus and solder decent 22–24 AWG feeders.
– Use a proven DCC command station and booster sized for the number of locomotives and accessories.
Reversing loops:
– Reversing loops create instantaneous polarity conflicts. Solutions:
– Use commercial auto-reversers that detect short-circuit and flip polarity, or
– Wire a reversing section to a separate booster with an auto-reverse module, or
– Implement DIY relay/Hall-switch circuitry for long lighted trains (requires planning; insulating gaps and detection sensors).
– Make reversing sections as long as your longest train if you wish to avoid complex electronics.
Accessories wiring:
– Use accessory decoders for turnout motors, signals, and lighting circuits.
– Plan for common return wiring and fuses or circuit breakers for protection.
Tools for wiring:
– Soldering iron (fine tip), flux, solder
– Wire stripper and crimper
– Multimeter for continuity and voltage checks
– Heat-shrink tubing and cable ties for neat runs
Step 5 — Control and Electronics
Choosing and setting up control depends on operational goals and budget.
Control options:
– DC: analog throttles for each block. Simpler and cheaper for one train at a time.
– DCC: allows independent control of multiple locomotives, sound, function mapping, and advanced features like momentum and consist control.
Sound and advanced features:
– DCC decoders can include sound. For analog layouts with sound-equipped DCC locos, an MRC Tech 6 or similar controller can power sound-enabled DCC-equipped locomotives on DC track.
– Consider function mapping for lights, smoke units, and auxiliary power.
Turnout motors:
– Under-table motors like Tortoise or Tam Valley pushrods are reliable for scenic layouts; they fit under foam pads but may require longer linkages.
– Solenoids are quick but can be loud; use dampeners or under-scenery installation to minimize noise.
Example control setup:
– A mid-range DCC system (e.g., Digitrax, NCE) with a power booster, stationary decoders for turnout control, and a handheld throttle for operators. Use an auto-reverser module for the reversing loop.
Step 6 — Rolling Stock Customization
Custom model trains and modding rolling stock are high-impact upgrades for realism and reliability.
Common mods:
– Replace plastic wheels with metal wheels for better conductivity and rolling characteristics.
– Add weight where necessary to meet recommended NMRA weight standards.
– Install metal or Kadee couplers and adjust heights with an NMRA coupler gauge.
– Upgrade trucks or bearings for smoother running.
Lighting and sound:
– Install LED interior lights in passenger cars (resistors sized for LED current).
– Add marker and ditch lights to locomotives; wire to decoders or an auxiliary power bus.
– For DC layouts, use a dedicated lighting bus or mod a sound-equipped loco for analog using an MRC Tech 6.
Decoders:
– For DCC, install motor and sound decoders in locomotives. Program addresses and function mappings.
– Bench-test decoders on a programming track before final installation.
Example projects:
– Weather a a boxcar using dry pigments and washes to match a particular era: light grime on lower sides, rust streaks around roofline and fasteners.
– Convert an old brass locomotive to DCC: install a decoder, solder motor and lighting leads, add weight, and mount speakers in the boiler or tender cavity.
Bench tips:
– Use a small vise and soft jaws to hold models while working.
– Test wheelsets on a continuity checker to ensure isolation between wheel flanges where necessary (reversing sections).
Step 7 — Scenery and Structures
Scenery brings your railroad to life. Start simple and layer detail.
Basic scenery steps:
1. Block in large forms with foam or plaster cloth.
2. Paint earth tones on the foam/plaster to hide bright foam color.
3. Apply ground cover (static grass, turf, fine ballast).
4. Add roads, ballast around track, and weathering.
5. Install structures and blend foundations into terrain.
Structures and customization:
– Kitbashing: mix components from multiple kits to create unique buildings.
– Scratchbuilding: use styrene or basswood for stand-alone structures.
– Weathering buildings: apply washes, drybrushing, and powders to age paint and simulate soot, rust, and faded signage.
Water features:
– Carve foam for riverbeds; use acrylic gel or resin for water. Add ripples with gloss medium or tinted resin layers.
Trees and vegetation:
– Use armatures with foliage clusters or static grass/type-specific scatter for realism.
– Plant trees at varying heights and densities; avoid perfectly straight rows.
Lighting scenery:
– Add LED streetlights, interior building lights, and signals. Use resistors and decoders appropriately.
Step 8 — Testing, Troubleshooting, and Maintenance
A well-laid track still needs testing and occasional troubleshooting.
Initial testing:
– Run a low-speed inspection train (heaviest loco with several cars) around every track at slow speed to detect bumps, gaps, and shorting points.
– Check frog and turnout polarities with a multimeter.
Common issues and fixes:
– Derailments: check rail height variations (file or replace high rail), clean wheel flanges, adjust turnout points, and check wheel gauge and truck rotation.
– Electrical shorts: isolate sections and use a multimeter; track gaps and insulating joiners can localize problems.
– Poor contact: add more feeders, clean railheads, and use metal wheels for improved conductivity.
– Coupler height problems: use NMRA coupler height gauge and adjust couplers or replace with type-compatible couplers.
Re-railers and uncoupling:
– Re-railers work best if rolling stock has minimal side-to-side play and trucks are properly gauged. If they fail, clean and adjust wheelsets and ensure track alignment into the re-railer segment.
Maintenance schedule:
– Clean rails monthly in moderate-use layouts (more often for high-use).
– Check wheelsets and couplers during operations or after long storage.
– Inspect turnout points and switch machines twice a year.
Example troubleshooting story:
– A layout experienced frequent derailments in reverse operation only. The culprit was slightly raised rail at a joint on the outer rail, producing a bump. Filing the high rail, cleaning, and adding weight to light cars solved the issue—an example of a small mod producing reliable running.
Step 9 — Advanced Modding Projects
If you want to push further, consider these projects:
– Auto-reverse circuits for long lighted trains using 4PDT relays and Hall-effect switches with magnets—great for layouts with long reversing sections.
– Full DCC sound installs with speakers in locomotives and synchronized effects (smoke, lights).
– Automated signaling and block detection for prototypical operations and computer-controlled sessions.
– Scratchbuilt industries with working cranes or conveyor belts.
Safety and patience:
– Electronics projects require basic soldering and safety awareness.
– Start with small, well-documented projects before attempting complex custom circuitry.
Tools and Materials Checklist
Essential tools:
– Soldering iron (25–40W) with fine tip
– Multimeter
– Wire strippers, flush cutters, hobby knives
– Small files and needle-nose pliers
– Pin vise and small drill bits
– Small vise and bench clamp
– Paints, brushes, and airbrush (optional)
Common materials:
– Track (flex and turnouts), cork roadbed
– Foam (extruded polystyrene), plywood
– Feeders and bus wire (14–24 AWG)
– DCC system or DC controllers
– LEDs, resistors, decoders, speakers, sound modules
– Scenic materials: ground foam, ballast, static grass, foliage clusters
Brands to consider (examples): Atlas, Peco, Kato, Bachmann, Digitrax, NCE, Tortoise for switch machines. Nickel-silver track is preferred for low-maintenance conductivity.
Final Examples: Small Projects You Can Do This Weekend
1. Upgrade a coach with interior LED lighting: remove roof, wire a 3V LED with an appropriate resistor to the car’s power pickups, and hide resistors inside the seating area.
2. Replace couplers on an entire train with Kadee #5s and set heights with a coupler gauge for reliable uncoupling and realistic appearance.
3. Weather a boxcar with a simple wash: dilute burnt umber acrylic paint, brush on, and wipe with a damp cloth to simulate grime and fading.
Conclusion
Model railroad modding and custom model trains deliver a deeply rewarding blend of technical challenge and artistic expression. A successful setup begins with thoughtful planning, solid benchwork, and careful track laying; it grows through methodical wiring and control choices; and it achieves personality through rolling stock upgrades, weathering, and scenic detail. Start with practical, achievable projects—improving wheelsets, adding LED lights, and cleaning and feeding your track—and build towards bigger mods like DCC sound installs and automated reversing loops. With patience and small wins along the way, your model trains and model railroad will run better, look better, and tell the unique story you want on rails.

