


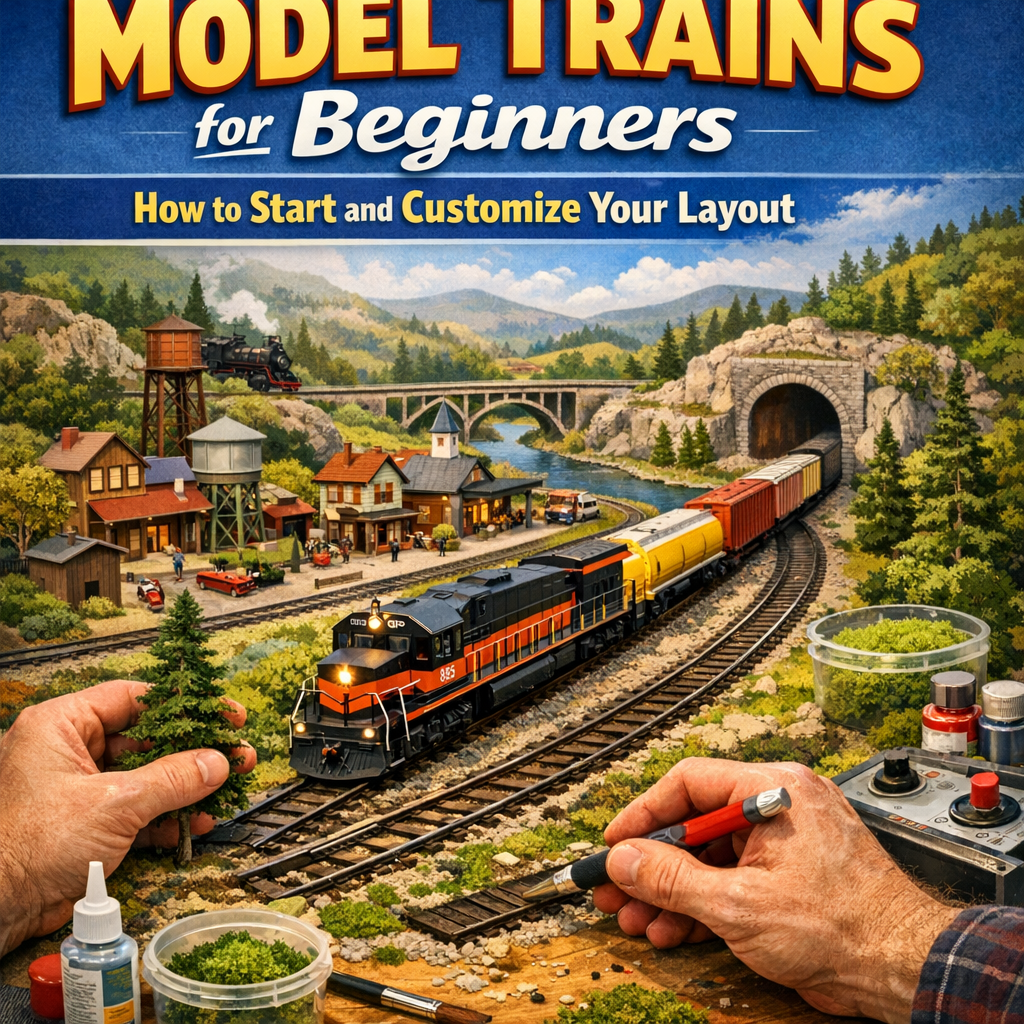
Model Trains for Beginners: How to Start and Customize Your Layout
Model railroading is a rewarding and creative hobby that blends engineering, art, and storytelling. Whether you’re fascinated by tiny diesel locomotives chugging through realistic scenery or you want to build a small shelf layout in your apartment, this model railroad beginner guide will take you step-by-step through how to start model trains, build a layout, and dive into model train customization and modding.
In this post you’ll find practical advice, tool lists, planning tips, examples, and project ideas so you can confidently start and customize your first model railroad.
—
Why Choose Model Trains? A Quick Overview

– Hands-on creativity: You design landscapes, buildings, and scenes using many different materials.
– Technical challenge: Wiring, DCC systems, and automation add engineering depth.
– Scalable: Start with a small oval and expand to a multi-room empire.
– Community: Clubs, online forums, and swap meets provide support and inspiration.
This guide targets “model trains for beginners” while giving pathways to advanced “model train customization” and “model railroad modding.”
—
Step 1 — Decide Your Goals and Constraints

Before shopping for locomotives and track, get clear on:
– Space available (shelf, table, entire room)
– Budget (starter vs. long-term investment)
– Interests (operations/switching, scenery, historical accuracy)
– Time available
Common beginner setups:
– Shelf/shelfie layout (narrow, long)
– 4×8 or 4×6 table (typical starter)
– Point-to-point or continuous loop
– Single-track branchline for operations practice
Example: If you have a 4×8 space and love freight operations, design a single-track main with a small yard and one industry for switching practice.
—
Step 2 — Choose a Scale and Gauge
The scale affects cost, space, and detail level. Common options:
– HO (1:87) — The most popular; great balance of size, availability, and variety.
– N (1:160) — Smaller; ideal when space is limited.
– O (1:48) — Large, impressive detail, but needs more space.
– G (Garden) — Outdoor layouts with weatherproof models.
For most beginners, HO or N is recommended. HO offers wider choices for locomotives, rolling stock, and scenery supplies, while N allows more layout in less space.
—
Step 3 — Analog DC vs Digital DCC
Two main control systems:
– DC (Direct Current)
– Simple, cheaper starters
– Control speed of trains by varying track voltage
– Each locomotive on the same electrical block responds together unless separate blocks are wired
– Good for small oval layouts or beginners testing the hobby
– DCC (Digital Command Control)
– Each locomotive has a decoder with an address — independent control on the same track
– Supports sound, lighting, functions, and automation
– More wiring planning but vastly superior for realistic operations
– Popular beginner DCC brands: Digitrax, NCE, Hornby (for some regions)
Recommendation: If your budget allows, start with DCC. Many “how to start model trains” guides now assume DCC for flexibility.
—
Step 4 — Plan Your First Layout
Planning saves time and money. Start with a simple, testable plan.
Essential elements:
– Benchwork (the base)
– Track plan (mainline, yard, sidings)
– Power and wiring schematic
– Scenery plan (terrain, structures, road)
– Staging or hidden tracks for through traffic (optional)
Starter track plan example (4×8 HO):
– Double-track mainline around the perimeter for continuous running
– Small yard with 3–4 tracks for car storage
– Industry spur for switching operations (e.g., lumber or factory)
– Scenic focal point: small town and a river crossing
Tools for planning:
– Paper grid or free software (SCARM, AnyRail trial, XtrackCAD)
– Kato Unitrack or Atlas Flex Track for easier layout building
—
Step 5 — Benchwork and Subroadbed
Benchwork options:
– Simple tabletop on sawhorses for temporary layouts
– L-girder or stud-framed table for permanent setups
– Shelf brackets for shelf layouts
Subroadbed:
– Use 1/2″ or 3/4″ plywood for the base
– Cork roadbed or foam (1/2″ pink foam) to reduce noise and provide grade shaping
– For N scale, 1/4″ foam is often enough
Build a simple 4×8 benchwork:
1. Cut two 4′ and two 8′ pieces of plywood for the tabletop.
2. Add 2×4 framing around the perimeter.
3. Mount a 1″ foam sheet and glue cork roadbed in place.
4. Test-fit track before final gluing.
—
Step 6 — Track Laying and Wiring
Track laying:
– Dry-fit everything before gluing or nailing
– Use rail joiners or Kato’s joinerless track for cleaner joints
– Plan turnouts (switches) where you want sidings and yards
– Keep curves as gentle as possible; check locomotive minimum radius
Wiring basics:
– Use feeder wires every 3–6 feet to avoid voltage drop
– Solder feeders to the rails for reliable connection (or use screw terminals on bus wires)
– Connect feeders to a bus line (14–16 gauge for bus wires; 22–24 gauge for feeders)
– For DC: create block wiring if you want independent control for multiple trains
– For DCC: connect the bus to the DCC booster and follow recommended wiring practice (constant voltage to the track)
Example wiring tool list:
– Soldering iron and rosin-core solder
– Wire stripper
– Continuity tester or multimeter
– Terminal blocks or distribution bus
—
Step 7 — Scenery Basics
Scenery transforms track into a believable world.
Basic ingredients:
– Foam, plaster cloth, and papier-mâché for terrain
– Woodland Scenics ground foam and turf for grass and bushes
– Static grass applicator for realistic grass
– Ballast (scale-appropriate aggregate) and diluted white glue for track ballast
– Trees (ready-made or handmade) and scenic details
Scenery process:
1. Mask track with painter’s tape.
2. Build terrain with foam layers or crumpled newspaper covered with plaster cloth.
3. Paint exposed plaster with earth-tone acrylics as a base.
4. Apply ground foam and static grass.
5. Add structures, roads, figures, and vehicles.
6. Weather everything lightly (see customization section).
Tip: Work from the background to the foreground—sky backdrop, distant hills, mid-ground structures, foreground details.
—
Step 8 — Model Train Customization and Modding
Once you have a running layout, customization and modding deepen the hobby. Here are beginner-friendly and intermediate mod ideas:
Common customizations:
– LED lighting in passenger cars and buildings
– Decoder installation for DCC control (speed, sounds, function keys)
– Coupler upgrades (magnetic uncouplers, knuckle couplers)
– Wheel and pickup cleaning improvements (better electrical contact)
– Weathering with washes, dry-brushing, and powders
Advanced modding and custom model trains:
– Kitbashing: Combine parts from multiple kits to create a unique prototype
– Example: Merge two freight car kits to make a longer or hybrid car
– Scratchbuilding small structures from styrene or basswood
– 3D printing custom components such as signage, figures, or unique vehicle parts
– Custom paint and decal work to represent a local or fictional railroad
– Sound decoders: Add realistic horn, engine, and brake sounds via ESU or Soundtraxx decoders
Example project: Convert a basic freight locomotive to a custom model train with DCC, sound, and weathering
1. Strip shell and clean the interior.
2. Install a DCC decoder (fit the harness per manufacturer).
3. Add a speaker (size depends on locomotive shell).
4. Apply weathering: a wash of thinned black/brown acrylic, stipple rust tones, and lighten with dry-brushed grays.
5. Add small details: handrails, air hoses, and stenciling with rub-on decals.
—
Step 9 — Weathering and Realism Techniques
Weathering and detail makes models look lived-in.
Techniques:
– Washes: Thin acrylic or enamel used to bring out panel lines and grime.
– Dry brushing: Use a nearly dry brush to highlight raised detail.
– Pastel powders: Apply to simulate dust and rust; fix with matte acrylic spray.
– Chipping medium: For paint chips and worn sections.
– Oil filters and sprocket marks: Add subtle streaks with oil paints thinned with mineral spirits.
Examples:
– Freight cars: Rust streaks and faded paint for a decades-old feel.
– Locomotives: Soot on the top and around the exhaust stack, grime around the trucks.
– Structures: Faded signs, mildew on lower walls, grime around gutters.
Keep it subtle. Over-weathering is a common beginner mistake.
—
Step 10 — Electronics, Automation, and Advanced Modding
Expand into electronics as your skills grow.
Options:
– DCC accessory decoders to operate turnouts and signals
– Occupancy detection for block-based automation (current-sensing or IR)
– Arduino or Raspberry Pi for custom automation (e.g., level crossing gates that operate on comprised logic)
– Computer control software (Rocrail, JMRI) for timetable operations and locomotive routing
Simple mod: Add LED streetlights on the layout
1. Plan 12V or 5V supply depending on LEDs.
2. Use resistor for each LED to avoid burning out.
3. Hide wires in under-table channels and tie into accessory power bus.
4. Use switches or a slow-fade LED driver for realism.
Try a beginner-friendly automation: Use JMRI with a basic throttle and block detection to run a round-robin timetable.
—
Tools and Supplies Checklist
Essential tools for beginners:
– Hobby knife and spare blades
– Small files and needle files
– Side cutters
– Pin vise and small drill bits
– Mini sanding sticks
– Soldering iron with fine tip
– Multimeter
– Paint brushes (various sizes)
– Tweezers and magnifier
– CA glue, PVA (white) glue, and epoxy
– Ruler, square, and small clamps
Consumables and materials:
– Track (starter packs, additional switch packs)
– Ballast and scenic materials (foam, turf, trees)
– Paints (acrylics recommended for beginners)
– DCC starter set (if chosen)
– Model kits and rolling stock
Budget tip: Buy a starter set (locomotive, cars, track, power pack) to test the hobby, then upgrade components as you learn.
—
Common Beginner Mistakes and How to Avoid Them
– Skipping planning: Quick setups often lead to frustration; spend more time planning track and wiring.
– Ignoring wiring: Bad electrical connections cause intermittent problems—solder feeders and use a proper bus.
– Over-complicating scenery early on: Start simple, then refine techniques.
– Buying too many models too fast: Accumulate rolling stock based on operations needs, not impulse.
– Neglecting maintenance: Clean wheels and track regularly; lubricate gears with appropriate oils sparingly.
Pro tip: Keep a troubleshooting notebook with wiring diagrams, decoder addresses, and maintenance logs.
—
Example Starter Project: 4×8 HO Beginner Layout (Step-by-Step)
Goal: Build a layout for continuous running and light switching operations.
Materials:
– 4×8 plywood tabletop, 2×4 framing
– 1″ pink foam insulation
– Kato Unitrack starter set (double-track oval)
– Digitrax Zephyr DCC starter set
– 6 turnouts (manual) for a 3-track yard and spur
– Small downtown kit and one industry kit
– Scenic materials (ballast, ground foam, plaster cloth)
Steps:
1. Build benchwork and attach tabletop.
2. Glue foam to tabletop and cut for river/road grades.
3. Lay and connect Unitrack, creating a double-track loop and a small yard area.
4. Wire a DCC bus beneath the table; attach feeders to track every 3–4 feet.
5. Test with one locomotive and set addresses.
6. Sculpt terrain with plaster cloth and paint base earth tones.
7. Ballast track using diluted white glue and ballast.
8. Install structures and add trees, figures, and vehicles.
9. Weather locomotives and rolling stock lightly.
10. Start operating: continuous running, then practice switching the industry.
Outcome: A functional layout with room for future expansion or more advanced electronics.
—
Where to Learn More and Find Community
– Magazines and websites: Model Railroader, Railroad Model Craftsman
– Forums and communities: TrainBoard, Model Railroad Hobbyist (MRH), Reddit r/modeltrains
– Clubs: Local model railroad clubs often have layouts and mentorship programs
– Video tutorials: YouTube channels such as Model Railroad Hobbyist, Virtual Railfan, and individual modelers who focus on DCC, wiring, and scenery
– Standards: National Model Railroad Association (NMRA) for standards and local education
Joining a club is one of the fastest ways to learn “model railroad modding” and see advanced techniques in action.
—
Advanced Projects to Try Later
– Full sound installation with ESU or Soundtraxx decoders and custom speaker boxes
– Building a helix to gain elevation and increase layout length in limited space
– Creating a realistic river with layered epoxy pour and realistic banks
– Full computer control with JMRI and automated operations schedules
– 3D printing custom structures, signage, or unique rolling stock parts
– Weathering entire consists for era-specific looks
—
Safety and Maintenance
Safety:
– Use proper ventilation when painting and airbrushing.
– Wear eye protection while cutting and drilling.
– Use a soldering iron with care; keep a fire extinguisher nearby.
Maintenance:
– Clean track and wheels regularly with isopropyl alcohol and track cleaning pads.
– Inspect electrical joints periodically and resolder if needed.
– Lubricate moving parts on locomotives with appropriate plastic-safe oil.
—
Costs and Time Estimates
– Bare minimum starter: $150–$400 (basic starter set, small track, simple scenery)
– Intermediate setup (DCC, better track, more scenery): $600–$2,500
– Long-term hobbyist: $3,000+ depending on layout size and customizations
Time commitment:
– Basic functional layout: weekends over 1–2 months
– Detailed scenery and customization: ongoing; many hobbyists spend years refining layouts
—
Conclusion
Model trains for beginners is an enriching hobby that combines planning, craftsmanship, electronics, and art. Use this model railroad beginner guide to choose a scale, pick DC or DCC, plan a realistic starter layout, and learn essential track-laying and scenery techniques. Once comfortable, explore custom model trains and model train customization through decoder installs, weathering, kitbashing, and even 3D printing. Start small, join the community, and expand your layout as your skills and imagination grow.
Ready to get started? Pick your space, choose HO or N scale, and plan a simple 4×8 starter layout. You’ll be surprised how quickly those tiny trains become a big part of your life. Happy modeling!

