


Small Space Model Train Layout Ideas
Fitting a model railroad into a small apartment, a spare closet, or a narrow hallway is a fun challenge that forces creativity and focus. With careful model railway layout planning and smart choices in scale, track design, and scenery, you can build an engaging, operational layout that looks far bigger than the space it occupies. This article walks through practical model train layout ideas, step-by-step planning, and small-space techniques for custom model trains, model train customization, and model railroad modding.
Contents:
- Choosing a scale and footprint
- Layout concepts that work in small spaces
- Benchwork and access considerations
- Track planning and turnout choices
- Scenery tips for scale illusion
- Electronics, wiring, and DCC options
- Customization and modding ideas
- Example mini layouts with dimensions
- Tools, materials, and resources
- Conclusion
Choosing a scale and footprint

Scale is the single biggest decision when building a small-space layout. Smaller scales let you compress scenes and operations into a given footprint.
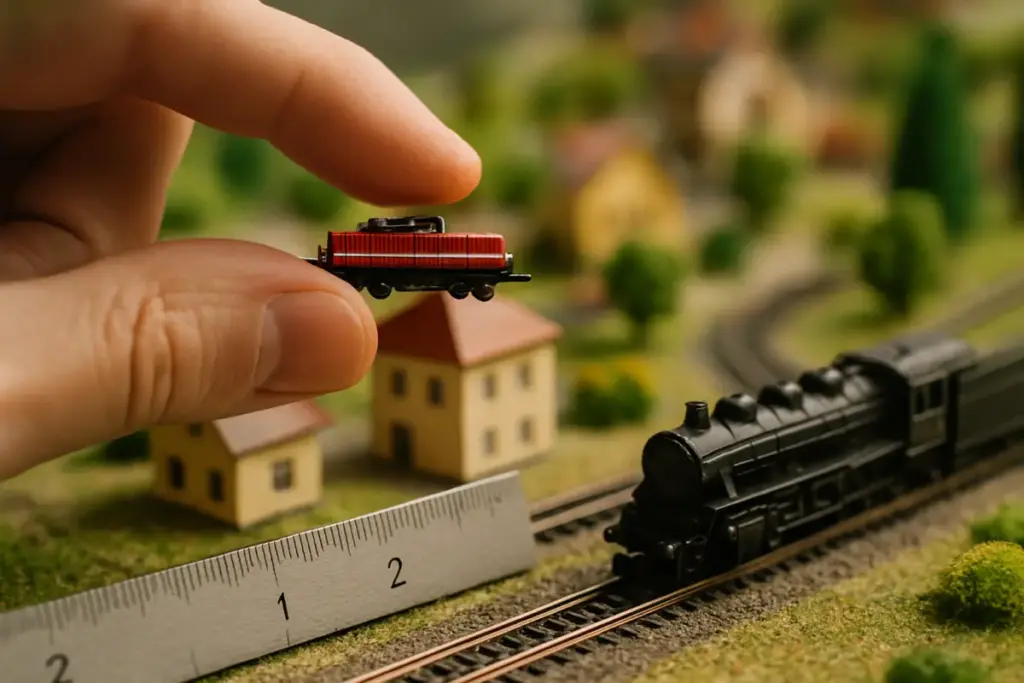
- Z scale (1:220): Best for extremely limited space. You can fit long trains and complex trackwork on tiny shelves. Track radii can be tighter, but attention to fine detail and lighting may be required.
- N scale (1:160): A popular compromise — good detail with manageable size. Many model train layout ideas for apartments and hobby nooks use N scale.
- HO/OO (1:87 / 1:76): Still feasible in small spaces if you accept fewer long trains or focus on switching operations. HO offers wide availability of rolling stock and scenery.
- O scale (1:48) and larger: Typically require much more space but can work in modular or dedicated room scenarios.
Choose a footprint that matches your available space: common small footprints include 2’ x 8’ shelf layouts, 4’ x 6’ compact tables, or L-shaped benchwork along two walls. Measure carefully and plan for a minimum working zone around the layout for comfortable access.
Layout concepts that work in small spaces

Small spaces lend themselves to particular layout types that maximize interest with minimal area. Here are proven model railroad layout ideas you can adapt:
1. Shelf and Wall-Long Layouts
- Ideal for hallways or above furniture.
- Single-track mainline with scenic vignettes spaced along the length.
- Hidden spurs and staging behind the scenes provide operational variety.
Benefits:
- Continuous run possibilities.
- Easy to reach from the front.
Example: A 10’ wall shelf in N scale with a continuous loop, two towns, and an industrial siding hidden behind a backdrop.
2. Shelf + Flip-Up / Hinged Sections
- Use a hinged shelf that folds down for storage or access.
- Useful in multipurpose rooms where the layout must be cleared occasionally.
3. L-Shaped Corner Layouts
- Make use of corner dead space.
- Provides two visual faces and allows longer runs in compact footprints.
Example: An 8’ x 2’ L-shaped layout with a small yard in the corner, a continuous run along each leg, and an urban scene on one arm.
4. Peninsula or Island Table
- A compact table with one or two sides available for viewing.
- Good for peninsula switching puzzles and fiddle yards underneath.
5. Switching/Operations Layouts (Inglenook, Timesaver)
- Focus on operative interest rather than long runs.
- Ideal for HO or N in 4’ x 2’ or even smaller footprints.
- Excellent for practicing realistic shunting and yard operations.
6. Multi-Level / Stacked Layouts
- Use vertical space by stacking levels with helixes or hidden ramps.
- Two or three levels give the illusion of distance in a small area.
7. Modular / Segmental Layouts
- Build in sections that can be rearranged or stored.
- Handy for model railroad modding and custom model trains that need frequent access.
Benchwork and access considerations
Good benchwork supports your track and hides wiring while providing comfortable access.
- Depth: For single-side viewing, 18–24 inches is usually adequate. For two-sided viewing, 30–36 inches is preferable.
- Height: Standard tabletop height (28–34 inches). Lower the bench for kids or reclining viewpoints if needed.
- Access: For shelf layouts, ensure you can reach all scenery easily. Incorporate removable sections, lift-out bridges, or hinged access panels for deeper areas.
- Edge protection: For narrow shelves, use a small lip or guard rail to prevent rolling equipment from falling.
- Under-layout space: Use it for staging tracks, power supplies, throttles, and storage.
Build benchwork with plywood or lightweight MDF for small setups; for ultra-light projects, an aluminum frame or IKEA furniture can be adapted.
Track planning and turnout choices
Model railroad layout design in small spaces is about maximizing operational interest while minimizing clutter and derailment risk.
- Minimum radius: Respect minimum radii for the scale and equipment you plan to run. Tight curves are fine for short, modern shifters but may limit longer or prototypical rolling stock.
- Turnouts: Use smaller turnout sizes (e.g., N scale No. 6 or HO #6) to save space, but for better reliability choose larger turnouts where possible. Consider bullhead or curved turnouts for smoother transitions.
- Reverse loops: Add reverse loops with insulated feeders or DCC auto-reversing modules to create interesting operations in compact areas.
- Over-under track: For multi-levels, plan helix gradients around 2–3% to avoid stalling — steeper grades need shorter trains.
- Fiddle yards/staging: Hide staging tracks beneath scenery or under the bench to simulate longer runs and provide operational variety without consuming scenic space.
- Passing sidings: Even a single siding adds switching tasks and schedule opportunities.
Plan track spacing to allow for scenery, vehicles, and maintenance access. For HO, a center-to-center spacing of 2.5–3 inches is typical; N scale can be closer.
Scenery tips for scale illusion
In small layouts the scenery must sell the scale and tell a story in a small frame.
- Depth of field: Use layered scenes—foreground details, midground buildings, and mural or photographed backdrops—to suggest distance.
- Forced perspective: Use smaller-scale trees (or scale-down conversion) and reduced-size buildings as they recede.
- Vignette approach: Build several well-detailed scenes rather than trying to model a whole region. Close-ups look better than sparse expanses.
- Vertical drama: Use cliffs, retaining walls, viaducts, and bridges to add vertical interest that takes up little floor space.
- Urban compression: Compress a bustling town into one or two blocks with narrow streets, small plazas, and rooftop details.
- Lighting: Well-placed LEDs inside buildings, streetlamps, and vehicle headlights enhance realism and depth.
For small layouts, less is often more—select a theme and concentrate detail where viewers will focus.
Electronics, wiring, and DCC options
Even tiny layouts benefit from tidy wiring and basic electronics.
- DCC vs DC: DCC (Digital Command Control) gives superior operational flexibility in small layouts because multiple locomotives can be controlled independently on limited track. DCC makes switching operations and running multiple engines easy without complex block wiring.
- Power bus and feeders: Use a power bus running under the bench with frequent feeders to prevent voltage drop. For N and HO, every 2–3 feet is a good rule of thumb for reliable current.
- Reversing loops: If building a loop with reverse polarity, use an auto-reverser module with DCC or carefully wire isolated sections for DC operation.
- Track detection: Infrared or current-sensing detectors can automate signals, street crossings, or computer control.
- Lighting: Use warm white LEDs for building interiors; dimmers add evening effects.
- Sound and smoke: Small sound decoders and cabin-mounted speakers can add atmosphere; keep speaker placement in hidden voids or under the bench for better tone.
Label each wire and create a simple wiring diagram during model railway layout planning. Good labeling makes future modding and maintenance far simpler.
Customization and model railroad modding
Small layouts are perfect arenas for custom model trains and model train customization. Tight spaces allow you to tweak rolling stock, locomotives, and structures for better performance and realism.
- Wheelsets and couplers: Upgrade wheelsets and couplers to smoother-running versions compatible with your scale. Micro-soldering skills may be needed for tight fits.
- Weighting: Add weight to short locomotives to improve traction on grades or poor trackwork. Use lead tape or small drilled brass weights.
- Motor swaps and decoder installs: Replace stock motors with low-voltage can motors or fit DCC decoders into tiny shells for independent control. This is classic model railroad modding.
- Body-mount vs draft-gear couplers: Decide between operational reliability and prototypical appearance. Draft-gear couplers mounted under the body can keep a realistic look while allowing operational performance.
- Lighting customization: Retrofit interior LEDs into kit-built buildings or coach interiors for nighttime scenes.
- Scratchbuilding and kitbashing: Combine parts from different kits to design unique structures that fit the space. Custom model trains and unique rolling stock paint schemes add character.
When customizing, keep small clearances in mind; test fits frequently. Document modifications for future repairs.
Example mini layouts with dimensions and operational goals
These example layouts are practical starting points, adaptable to N, HO, or Z scales with scale-specific track radii adjustments.
Example 1: N-Scale 10’ Wall Shelf — “Coastal Route”
- Footprint: 10’ x 12" shelf at eye level.
- Concept: Single continuous loop with two scenic vignettes (lighthouse and harbor) and two hidden spurs for staging.
- Operations: Continuous passenger or freight runs; occasional reverse into hidden harbor siding to load/unload.
- Key features: Painted backdrop mural of sea and sky, foam hills on small islands, dock with two freight spots.
Why it works: Long shelf allows the illusion of distance. Hidden staging provides variety without enlarging the scenic footprint.
Example 2: HO 4’ x 2’ Table — “Industrial Switcher”
- Footprint: 48" x 24" table.
- Concept: Focused switching layout based on the Timesaver puzzle.
- Operations: Move cars between interchange, warehouse, and factory spurs within a tight operating session.
- Key features: Compact yard with three sidings, a runaround, small office building, and road crossing.
Why it works: Engine-run time is short but operations are dense and satisfying. Great for practice and demonstrations.
Example 3: N-Scale 6’ L-Shaped Corner — “Mountain Pass”
- Footprint: 6’ x 6’ measured along two walls, 18" depth.
- Concept: Two-level layout with a hidden helix to a staging yard under the bench.
- Operations: Short freight runs between mountain quarry and town, occasional passing in the elevated section.
- Key features: Tall cliff face, single-arched viaduct, forced perspective trees.
Why it works: Verticality creates dramatic scenes and implies long routes. The hidden helix stretches operations without needing long visible track.
Example 4: Z-Scale Travel Case — “Pocket Layout”
- Footprint: Portable 24" x 14" case with hinged lid.
- Concept: Small diorama with a U-shaped track and a staging siding hidden by a removable building.
- Operations: Quick shuttle or switching; ideal for demonstrations or travel.
- Key features: Built-in battery DCC, LED lighting, tiny scenic details.
Why it works: Ultra-compact, portable, and a great canvas for custom model trains and modding experiments.
Tools, materials, and resources
Essential tools:
- Precision hobby knives and files
- Foam cutting tools, hot wire cutter (if using foam)
- Pin vise and micro-drills
- Small soldering iron and wire stripper
- Rail nippers, track gauge, and rail joiners
- Paint brushes and airbrush (optional for weathering)
- Tweezers and magnifier for small-scale work
Materials:
- Plywood or MDF for benchwork
- Cork or foam roadbed
- Ballast, scenic materials (ground foam, static grass)
- PVA glue, scenic cement, and contact adhesives
- LED strips, resistors, connectors, and DCC components
Planning software and references:
- CAD or track planning software for model railroad layout design (several hobby-specific tools exist).
- Online plan repositories for proven track plans (searchable by scale and footprint).
- Community forums and social groups focused on model railroad modding and customization.
- YouTube channels and blogs with build-along content for small layouts and specific mods.
Keep a small parts bin for spare couplers, wheelsets, screws, and track pins. Organization reduces frustration in tight projects.
Practical tips and pitfalls to avoid
- Test trackwork before gluing. Small layout errors are magnified and harder to correct after scenery goes down.
- Use realistic clearances for buildings and vehicles. Model train customization often requires trimming to avoid rubbing against scenery.
- Avoid overcomplicating electronics in very small projects; simple and reliable beats flashy and fragile.
- For public or portable exhibits, protect exposed track with lightweight rails or barriers.
- Plan for maintenance access. Removable roadbeds, hinged roofs, or top-access panels make troubleshooting easier.
Inspiring small-space themes
- Urban micro-district: Rooftop gardens, tramline, and narrow alleys packed into a shelf.
- Rustic logging spur: Steam-era operations with a short logging incline and sawmill.
- Industrial switching: Warehouses, tank farms, and a small engine house for nighttime lighting scenes.
- Harbor and fishing village: Crates, small docks, and a ferry spur in N scale or smaller.
- Mountain mining: Ore loaders, switchbacks, and small switching operations up steep grades.
These themes play to the strengths of compact settings and lend themselves well to model train customization and scenic storytelling.
Conclusion
Small-space model train layouts are not compromises; they are focused, creative platforms that invite experimentation with model railroad layout design, custom model trains, and model railroad modding. By choosing the right scale, planning realistic trackwork, prioritizing operations over unnecessary expanse, and applying forced perspective and lighting, you can produce a striking, fun-to-run layout in almost any footprint. Start with a clear layout plan, pick one or two operational goals, and use customizations sparingly to enhance reliability and realism. With clever model railway layout planning and a few hands-on mods, your small space can become a tiny, vibrant railroad world.

